
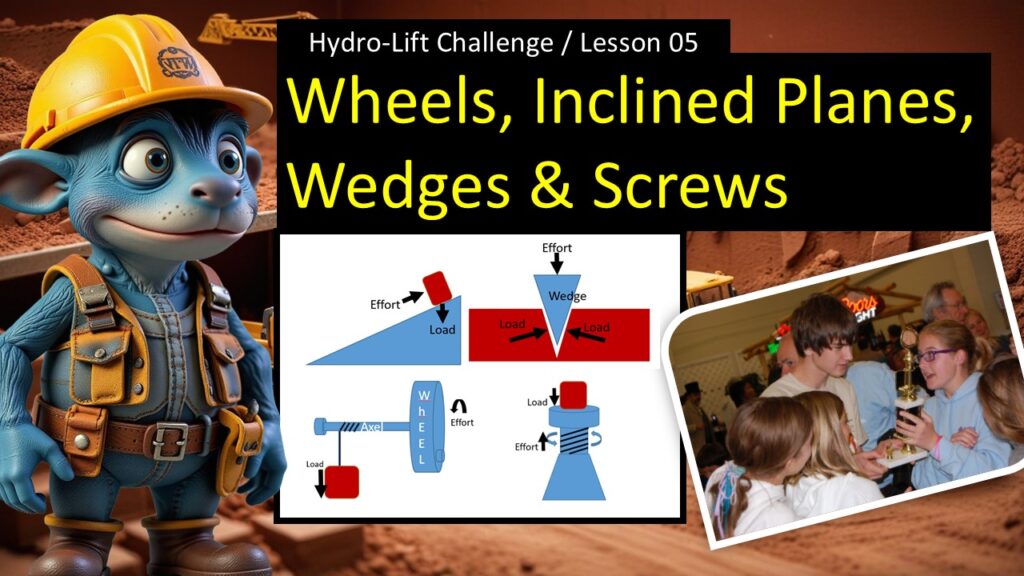
This lesson introduces the remaining simple machines: the screw, wheel and axle, wedge, and inclined plane. Students learn what each one does and how they appear in everyday life. These ideas help them see how even simple systems combine to create more complex machines like the Hydro-Lift.
Goals for the Lesson
By the end of this lesson, students will:
• Understand what each of the four machines does
• Recognize real-world examples
• Understand how each machine changes force
• Begin to see how these machines appear in their hydraulic kit
• Build confidence for combining all six simple machines later
Materials Needed
• SWWI PPT (Lesson 05)
• A few simple objects (optional): a screw, a wheel, a wedge, a ramp
• Whiteboard or paper
Lesson Timing
Total: 25–30 minutes
• Warm Start: 2 minutes
• Inclined Planes: 5 minutes
• Wedges: 5 minutes
• Screws: 5 minutes
• Wheels & Axles: 5–10 minutes
• Close: 2 minutes
Lesson Flow
1. Warm Start
Direction: Show the title slide.
Teacher Speaking Points:
“Today we’re exploring the last four simple machines. These machines might look different, but they all help us use force in easier or smarter ways.”
2. Inclined Planes
Direction: Show the inclined plane slide.
Teacher Speaking Points:
“An inclined plane is a flat surface that’s tilted. Instead of lifting something straight up, you move it along the ramp. You travel a longer distance, but you use less effort.”
3. Wedges
Direction: Show the wedge slide.
Teacher Speaking Points:
“A wedge is two inclined planes back-to-back. Instead of sliding something up the plane, you push the wedge into an object to split it, lift it, or hold it in place. Knives, axes, and doorstops are wedges.”
4. Screws
Direction: Show the screw slide.
Teacher Speaking Points:
“A screw is an inclined plane wrapped around a cylinder. Turning the screw moves something forward slowly but with a lot of force. That’s why screws hold things together so tightly with so little effort.”
5. Wheels and Axles
Direction: Show the wheel-and-axle slide.
Teacher Speaking Points:
“A wheel and axle is two parts that turn together. When the wheel turns, the axle turns too. This reduces friction and makes it easier to move or rotate objects. Cars, doorknobs, and rolling carts all use wheels and axles.”
6. How These Machines Change Force
Direction: Show the combined examples slide.
Teacher Speaking Points:
“All four machines change force in helpful ways. Some reduce friction. Some multiply force. Some turn twisting motion into lifting motion. Even though they look simple, they are everywhere in engineering.”
7. Why These Matter for Hydro-Lift
Direction: Connect to the challenge.
Teacher Speaking Points:
“You’ll see these machines hidden inside your kit pieces. Screws hold structures together. Wheels and axles appear in rotating parts. Wedges help stabilize. Inclined planes guide motion. None of them work alone — they come together to make a complete system.”
8. Quick Reflection
Direction: Invite a brief share-out.
Teacher Speaking Points:
“Think about your lift. Do any of these simple machines show up in your early ideas? Even if you don’t see them yet, you will once you start building.”
9. Close
Direction: Wrap up the lesson.
Teacher Speaking Points:
“Now you’ve learned all six simple machines. In our next lesson, we’ll explore hydraulics and how water pressure gives you real lifting power.”