
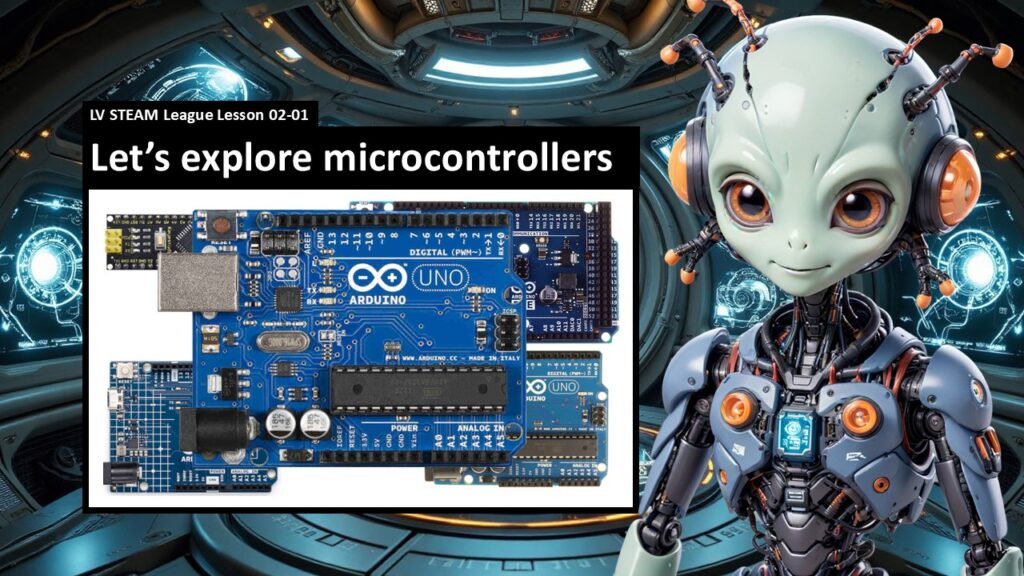
This lesson invites students into the world of microcontrollers by comparing them to the computers they already know. Students discover that even though microcontrollers are tiny, they are powerful little brains that run machines, robots, sensors, and projects all around us. This lesson is about unlocking curiosity. Students learn what an Arduino is, why it matters, and how it becomes a tool for creative building. Our goal is to help them feel excited and capable as they begin writing simple code and exploring basic electronics.
Student Learning Goals
By the end of this lesson students will be able to
• Explain the difference between a computer and a microcontroller
• Identify the Arduino and understand its purpose
• Recognize that microcontrollers run a single program with perfect timing
• Understand that sensors help an Arduino sense the world
• Feel confident and curious about building with Arduino
Materials Needed
Notebooks
Arduino Uno or Arduino Micro boards
USB cables
Class computers or Chromebooks with Arduino IDE
Sample sensors such as LEDs, buttons, or temperature sensors
Teacher supplied examples or demo units
Any printed worksheets or handouts
Teacher Preparation Notes
Before class, take a moment to plug in an Arduino and make sure the IDE is ready to upload a simple sketch. You do not need to run code during this lesson, but having a board blink an LED can spark excitement.
Review the difference between computers and microcontrollers so you feel comfortable guiding that comparison. The students do not need deep technical knowledge. They mainly need reassurance that this is simple and learnable.
If you have a few different Arduino boards or sensors, set them out where students can touch them. Hands on exploration builds confidence.
Safety Notes
We handle electronics slowly and gently.
We never force wires or press on components.
We keep drinks off the tables.
We stay aware of our cords so no one trips.
We treat every tool with respect.
Warm Up Activity
Hold up a laptop or point to a classroom computer and ask
What parts do you think live inside this machine
Let students guess anything from screens to memory to fans. Celebrate all answers.
Then hold up an Arduino. Ask
What do you think this tiny board can do
Let them guess again. The idea is to open curiosity and wonder before the lesson begins.
This should take two to three minutes.
Lesson Flow
**Step One
Computers Have Many Parts**
Show the slide about computer components.
Explain in friendly language that a computer is a whole complicated system made of many interacting pieces that allow it to do millions of different tasks.
Reassure students that microcontrollers are actually much simpler, which makes them easier to learn.
Teacher note
Take it slow. Students often feel intimidated by “coding” but reminding them that microcontrollers are simpler than computers helps remove fear.
**Step Two
Microcontrollers Have One Job**
Introduce the idea that a microcontroller is just a brain. No screen. No graphics card. No hard drive.
It runs a single program again and again with perfect timing.
Help students understand that this makes microcontrollers very reliable for robots and machines.
Teacher note
Use an example such as a crosswalk button or a microwave keypad. These devices are run by microcontrollers that repeat tiny tasks with consistency.
**Step Three
Meet the Arduino**
Show the slides of Arduino Uno, Arduino Micro, and other versions.
Explain that Arduino is an open source platform designed for artists, hobbyists, makers, and students like them.
Let them know they will start using one soon, and that no previous experience is required.
Encourage them to hold one if available.
Teacher note
If you have a blinking demo, this is a perfect moment to show it. It builds excitement.
**Step Four
How Fast Is an Arduino**
Introduce the idea that even though Arduinos are tiny, they are surprisingly fast and powerful.
You don’t need exact numbers. Just help students understand that microcontrollers can read sensors and react very quickly.
Ask
What kinds of things do you think need fast reactions
Students might mention robots, alarms, game controllers, timers, etc.
**Step Five
Shields and Sensors**
Display the sensor list and reassure students that they will not need to memorize any of it.
Explain that sensors help an Arduino sense the world.
A microphone senses sound.
A temperature sensor senses heat.
A light sensor senses brightness.
Explain that all these sensors simply give information to the tiny brain so it can react.
Teacher note
The goal here is wonder, not mastery. Help them feel excited about possibilities.
**Step Six
Hands On Exploration (Optional Mini Activity)**
Pass around one simple sensor like a button, LED, or temperature sensor.
Invite students to look closely at it and imagine what jobs it could do.
Ask
What could you build if your Arduino could sense light or motion
Encourage playful thinking.
**Step Seven
Group Reflection**
Bring the class together and ask
What surprised you about microcontrollers
Which sensor sounded interesting
What do you think you might build one day
Help students feel proud of their curiosity and remind them that confidence grows through exploration.
Teacher Notes for Each Slide
(short, friendly, and easy to skim)
Slide
Computers have many parts
Remind students that computers do lots of different things. Set them up for the comparison.
Slide
Microcontrollers have ONE part
Explain that this simplicity is what makes them powerful and easy to use.
Slide
Arduino definition
Share that Arduino is open source and designed for creators. Emphasize that “this is made for you.”
Slides
Arduino Uno, Micro, R4, Q
Let students see that Arduinos come in many shapes. The differences don’t matter yet.
Slide
Sensors list
Do not read the whole list. Pick two or three examples and celebrate the possibilities.
Slide
Let’s explore the universe of Arduino
Use this as your closing moment of excitement.
Independent or Group Activity
Give students an Arduino board drawing or a real board. Ask them to label these three things
• The brain (main chip)
• The pins
• The USB port
Then ask them to imagine and write down one invention they might create with an Arduino.
Vocabulary and Concepts
Microcontroller
A tiny computer brain that runs one program again and again.
Arduino
A simple open source board that helps makers build interactive projects.
Sensor
A tool that lets the Arduino gather information from the world like light, sound, or temperature.
Program
A set of instructions the Arduino follows exactly every time.
Wrap Up
Ask students
What did you discover today
What makes microcontrollers different from computers
What would you tell someone who missed this lesson
Keep the moment gentle and appreciative.
Exit Ticket
One
What is the main job of a microcontroller
Two
Name one sensor you found interesting and why.
Quiz
1. Multiple Choice
What is a microcontroller
A big computer
A tiny brain that runs one program
A type of screen
2. Short Answer
What is the Arduino used for
3. Multiple Choice
Which of these is a sensor
Banana
Temperature reader
Sticker
4. Short Answer
Name one way a microcontroller is different from a computer.
5. Short Answer
What is something you might want to build with an Arduino
Teacher Reflection
What parts of the comparison between computers and microcontrollers landed well
Which students were especially curious
Did the sensor examples spark ideas
What would you adjust next time to make the introduction feel even smoother and more welcoming