
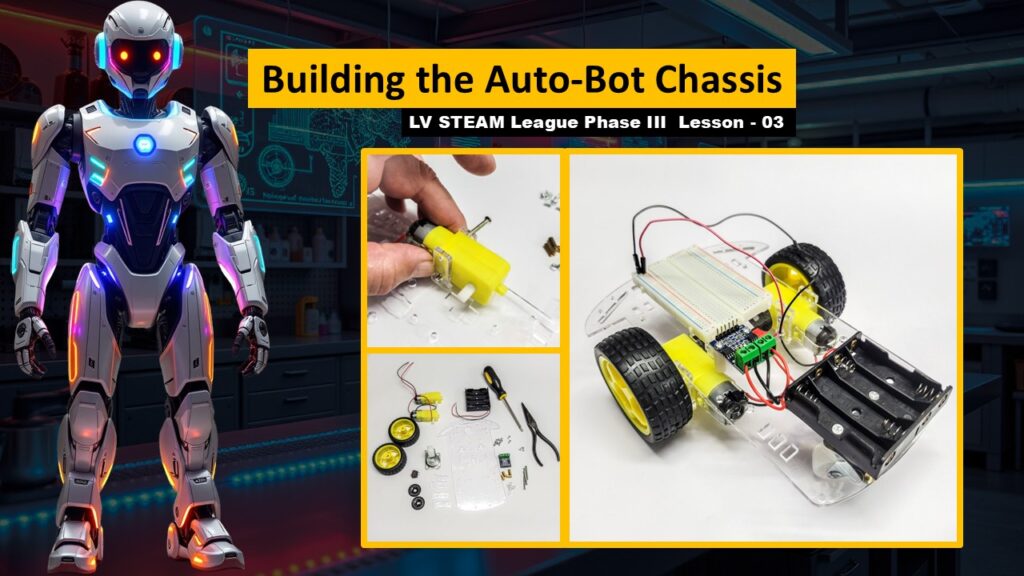
Today students begin turning loose parts into a real robot. This lesson is all about building the Auto-Bot’s body, piece by piece, in a calm and steady way. Students explore how the motors, wheels, battery box, switch, and H-bridge physically come together to form the frame of their robot. The goal is to help them feel comfortable with tools, confident with assembly steps, and proud of the structure they create. Nothing needs to move yet. We are simply laying the foundation for everything the robot will soon be able to do.
Student Learning Goals
By the end of this lesson students will be able to
• Identify the key parts of the Auto-Bot chassis
• Assemble the rover body, motors, wheels, and caster
• Install the battery box, switch, and H-bridge mounting posts
• Understand how careful assembly supports future wiring and coding
• Build confidence using simple tools and following step by step instructions
Materials Needed
Rover body
Motor mount brackets
Motors and gearboxes
Wheels
Caster wheel and spacers
On and off switch
Battery box
Encoder wheels (if included)
H-bridge and standoffs
Round head screws
Flat head screws
Long screws
Nuts
Needle nose pliers
Phillips screwdriver
Optional: soldering iron, heat shrink tubing, small glue drop
Teacher Preparation Notes
Before class, lay out the parts in small labeled piles. Students feel more relaxed when they can clearly see what belongs where. Check that every group has the same pieces and tools. If you plan to demonstrate soldering on the switch, prepare a safe area for that, but remember that soldering is optional. The lesson works perfectly with just twisting and tightening connections.
Move slowly and encourage students to take their time. Some will rush, and some will freeze. Your calm tone will help everyone stay confident.
Safety Notes
We move slowly when using screwdrivers and pliers
We keep hands away from sharp wire ends
We check that all screws are snug, not overly tight
If soldering is demonstrated, you control the iron and remind students to stay clear
Warm Up Activity
Hold up the bare rover body and ask
What parts of a robot do you think connect here
Let students make guesses about motors, wheels, or the switch. This warms up their imagination before the build begins.
Lesson Flow
Step One – Meeting the Parts
Walk students through each component in the kit. Let them hold the rover body and look closely at the mounting holes. This helps them feel comfortable before assembling anything.
Teacher note
Students relax when they understand what each piece is for, even if they don’t know how it works yet.
Step Two – Installing the Motor Mount Brackets
Show how the clear brackets slide through the rover body. Students insert long screws through the brackets and into the gearboxes. Nuts go on the inside.
Remind students that the motor wires should face inside the robot and the axle should face the front.
Teacher tip
If a student struggles with lining up holes, pause and breathe with them. This part is fiddly for everyone.
Step Three – Building and Mounting the Caster Wheel
Students attach the four spacers to the caster wheel using round head screws. Then they mount the caster assembly to the underside of the robot using only the back two holes.
Explain that the caster supports the front of the robot while the motors drive the back.
Step Four – Installing the On/Off Switch
Students insert the switch from the top of the chassis so the metal pins appear on the motor side.
Connect the red battery wire to one pin and prepare a jumper wire for the breadboard power later. Extend the gray ground wire so it can reach the breadboard.
Teacher note
Reassure students that wiring will be explained fully in a later lesson. Today they are only placing the switch.
Step Five – Attaching the Battery Box
Using flat head screws, students secure the battery box through the chassis and into the caster assembly. Make sure the wires from the battery box point toward the front.
Teacher tip
Explain that keeping wires forward helps with neat wiring later.
Step Six – Mounting the H-Bridge Standoffs
Students use round screws and standoff posts to attach the front holes of the H-bridge mounting area. Only one screw passes upward to the H-bridge.
A tiny drop of glue can help keep it secure if needed.
Step Seven – Connecting the Motor Wires
Students trim and insert each motor’s wires into the correct sides of the H-bridge
Left motor wires go to the left side
Right motor wires go to the right side
Teacher note
Students often reverse these. Let them know it’s normal and easy to fix later.
Step Eight – Optional: Install the Breadboard
Some builds place the breadboard now, others wait for the wiring lesson. Either is acceptable.
Teacher Notes for Each Slide
Slides showing parts
Help students name each item so they gain confidence before building.
Slides showing assembly steps
Move slowly. Show one step at a time. Let students match their parts to the images.
Slides showing the switch and battery box
Reassure students that wiring will make sense later. Today is simply placing components.
Slides showing the H-bridge installation
Show exactly where the standoffs go. Students may need help aligning holes.
Slides about motor wire insertion
Explain that this is the first moment where their robot begins to take shape internally.
Independent or Group Activity
Have students gently push their nearly assembled chassis across the table.
Ask them
What do you notice about how your robot rolls
This helps them feel the weight and balance of the structure they created.
Vocabulary and Concepts
Chassis
The robot’s main body that holds everything together.
Caster wheel
A free spinning wheel that helps the robot glide smoothly.
Gearbox
A small mechanism that gives motors strength and control.
H-bridge
A circuit that will later allow the robot to drive forward and backward.
Wrap Up
Ask students
What part of the build felt the most satisfying today
Remind them that they just built the foundation of a real robot. The rest of Phase III builds beautifully on this moment.
Exit Ticket
Write one thing you learned about assembling a robot body
Write one part you are excited to work on next
Quiz
A gentle check for understanding
- What is the chassis
- Why do we use a caster wheel
- What do the motor brackets hold in place
- Why is the battery box attached firmly
- What does the H-bridge mount prepare us for later