
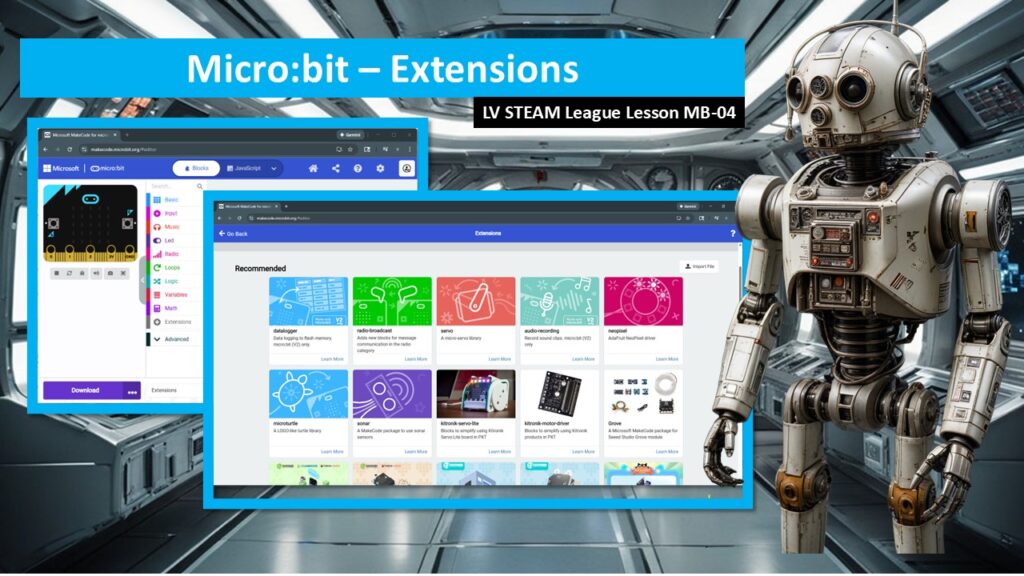
In this lesson, students discover how micro:bit can grow beyond its built-in features by using extensions. Students learn that coding languages start with a core set of abilities and that extensions allow new hardware, robots, and devices to work with their programs. This lesson helps students understand how tools expand, how creativity scales, and why adding extensions is a normal and exciting part of building real technology projects.
This lesson is about empowerment. Students realize they are not limited to what they see on screen at first. They learn how to unlock new possibilities safely and confidently.
Student Learning Goals
By the end of this lesson students will be able to: • Explain what an extension is in simple terms • Recognize when an extension is needed for a device • Add an extension to a MakeCode project • See new code blocks appear after adding an extension • Understand that extensions expand what their micro:bit can do
Materials Needed
micro:bit devices Computers with internet access micro:bit MakeCode editor At least one extension based device such as a Mini Car or motor board
Teacher Preparation Notes
Before class, open a blank MakeCode project and practice adding an extension so the flow feels calm and familiar. If possible, have a physical extension device available to show students so they can connect the idea of software extensions to real hardware.
Safety Notes
We handle devices carefully We only use approved extensions We stay patient when new blocks appear We help each other learn
Warm Up Activity
Ask students: If you had a toy that could only do one thing, what would you add to make it more fun
Explain that today they will learn how to give their micro:bit new abilities.
Lesson Flow
Step One – Core Code vs Expanded Code
Explain that every programming language starts with a core set of tools. In MakeCode, these are the basic blocks like lights, buttons, loops, and logic. These blocks let students do many things, but not everything.
Explain that when we want to control something new, like a robot car or a remote control, we need to teach the programming environment how to talk to that device.
Step Two – What Is an Extension
Explain that an extension is like adding new tools to a toolbox. It gives MakeCode new instructions so it knows how to control a specific piece of hardware.
Explain that extensions are also called libraries and that many companies create them so their devices can work easily with micro:bit.
Step Three – Exploring the Extensions Button
Show students the MakeCode categories and point out the small plus sign next to Extensions. Explain that this button opens a library where new tools can be added.
Explain that when an extension is added, new code blocks appear automatically.
Step Four – Adding an Extension
Demonstrate adding an extension, such as the Mini Car extension. Explain that once the extension loads, new blocks appear that control movement, motors, or remote features.
Help students notice how the workspace changes and how new abilities become available instantly.
Step Five – When Extensions Do Not Appear
Explain that sometimes an extension does not appear in the list. In those cases, the maker of the device can provide an extension file or link.
Explain that MakeCode allows these extensions to be added using the Import File option, just like loading saved programs.
Reassure students that this is normal and part of working with real hardware.
Step Six – Why Extensions Matter
Explain that without extensions, the micro:bit would not know how to talk to most devices. Extensions are what allow creativity to grow and projects to become more complex.
Explain that this idea applies to almost all programming and technology, not just micro:bit.
Teacher Notes for Each Slide
Use the slides to guide the explanation and pause often so students can look at the screen and make connections. Keep the tone curious and encouraging. Remind students that nothing is permanent and that adding an extension simply unlocks new possibilities.
Independent or Group Activity
Have students add an extension to a blank project and explore the new blocks that appear. Ask them to drag a few blocks into the workspace and imagine what kind of project they could build using those tools.
Vocabulary and Concepts
Extension Extra code that adds new abilities to a program
Library A collection of code that helps control specific devices
Core blocks The basic tools that come with MakeCode
Wrap Up
Ask students: What did adding an extension change Why do you think extensions are important How do extensions help inventors build bigger ideas
Reinforce that learning to add extensions gives them control over what their technology can become.
Exit Ticket
Answer one question: What is an extension and why do we use it
Quiz
- What is an extension
- Why do we add extensions in MakeCode
- What happens after an extension is installed
- Where do you click to add an extension
- What can you do if an extension does not appear in the list
Teacher Reflection
What parts of this lesson excited students most Did students understand the idea of expanding tools What should be adjusted for future classes