
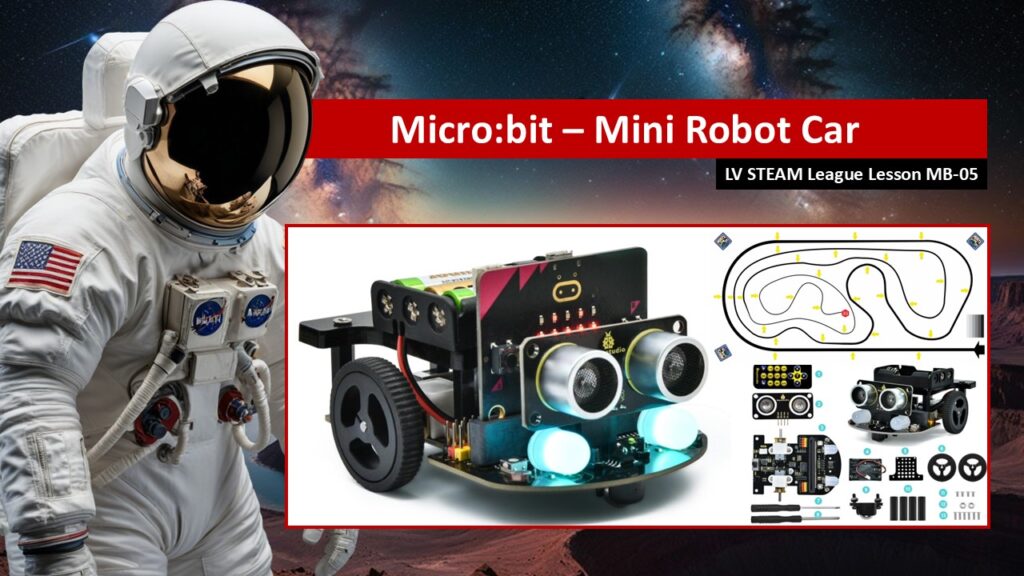
In this lesson, students are introduced to the Keyestudio Mini Robot Car and discover how the micro:bit can control a moving robot. This lesson is designed to feel exciting and empowering. Students see how sensors, motors, and code come together to create a real, physical machine that responds to the world.
Rather than memorizing steps, students explore what the Mini Robot Car can do, learn how its parts work together, and begin unlocking its capabilities using starter code. This lesson sets the stage for future challenges, creativity, and experimentation.
Student Learning Goals
By the end of this lesson, students will be able to: • Identify the main parts of the Mini Robot Car • Explain how the micro:bit controls the robot • Understand the role of sensors in robot behavior • Load starter code for the Mini Robot Car • Explore basic robot functions with confidence
Materials Needed
Keyestudio Mini Robot Car kits micro:bit boards Computers with internet access micro:bit MakeCode editor Mini Robot Car starter file IR remote controls USB cables
Teacher Preparation Notes
Before class, assemble at least one Mini Robot Car so students can see a complete working example. Make sure the starter file is ready to share with students and that you have practiced importing it into MakeCode. Familiarize yourself with the car’s sensors so you can point them out calmly and confidently.
Safety Notes
We move robots only in safe areas We keep fingers away from spinning wheels We power down robots when not in use We respect shared equipment We test robots slowly and carefully
Warm Up Activity
Ask students: What makes something a robot instead of just a toy
Explain that today they will see how code, sensors, and motors work together to create a real robot.
Lesson Flow
Step One – Meet the Mini Robot Car
Introduce the Keyestudio Mini Robot Car as a small but powerful robot. Let students observe its size, wheels, sensors, and micro:bit connection. Explain that this robot can move, sense its surroundings, and respond to commands.
Reassure students that they do not need to understand everything at once. Today is about exploration and curiosity.
Step Two – What Can the Robot Sense
Explain that the micro:bit provides many built in sensors such as sound, movement, light, and temperature. Explain that the robot also adds new sensors that extend what the micro:bit can sense.
Introduce the ultrasonic distance sensor and explain that it helps the robot detect walls and objects so it can avoid crashing.
Introduce the line sensors and explain that they help the robot see lines on the floor.
Step Three – How We Control the Robot
Explain that the robot can be controlled in different ways. One way is through code that runs automatically. Another way is through the IR remote, which sends signals telling the robot when to move, stop, or turn.
Explain that this makes the robot feel responsive and interactive.
Step Four – Motors and Expansion
Explain that the Mini Robot Car includes a motor controller that allows the micro:bit to control wheels and movement. Explain that the board also has space to connect other devices like servo motors and extra sensors.
Help students understand that robots grow as we add more tools and ideas.
Step Five – Loading the Starter Code
Explain that to get started quickly, students will use a starter file provided by the teacher. This file sets up the Mini Robot Car so the micro:bit knows how to talk to the motors, sensors, and remote.
Explain that they can import this file into MakeCode just like they learned in earlier lessons. Once loaded, new blocks for the Mini Robot Car and IR remote will appear in the coding environment.
Step Six – First Exploration
Give students time to explore the new blocks and try simple actions such as moving forward, stopping, or turning. Encourage them to test ideas slowly and observe how the robot responds.
Reinforce that experimenting and making small changes is part of learning.
Teacher Notes for Each Slide
Use the slides to introduce each feature without rushing. Allow students to physically see the parts you are describing. Keep the tone exciting but calm. Emphasize safety and curiosity rather than speed or competition.
Independent or Group Activity
Have students work in pairs or small groups to make the robot perform one simple task, such as moving forward and stopping or responding to the remote. Encourage them to talk about what the robot is sensing and why it behaves the way it does.
Vocabulary and Concepts
Robot A machine that senses, thinks, and acts
Sensor A part that gathers information from the world
Motor A part that creates movement
Ultrasonic sensor A sensor that measures distance
IR remote A controller that sends signals using light
Starter code Code that helps set up a project quickly
Wrap Up
Ask students: What surprised you about the Mini Robot Car What sensors do you think are most important What would you like the robot to do next
Reinforce that today was about discovery and that future lessons will unlock even more possibilities.
Exit Ticket
Answer one question: What is one thing the Mini Robot Car can sense or do
Quiz
- What device controls the Mini Robot Car
- Name one sensor on the robot
- What does the ultrasonic sensor help the robot do
- What is the purpose of the starter code
- How can the IR remote control the robot
Teacher Reflection
What excited students most in this lesson Did students handle the robot safely What concepts should be revisited next time